
Gabriella's Sew Along Day 8: Final Details, Button Holes, and Buttons
Today is also a catch up day.Welcome to Day 8 of the Gabriella’s Winter Coat Sew-A-Long! Are you still with us? Day 5 was a mid sew-a-long catch up day. If you need to go back, here is where you can find Day 1, Day 2, Day 3, Day 4, Day 6, and Day 7.
Today will be fairly quick to finish. If you have never sewn button holes before, don't worry, I will be showing you how in detail. Today will be steps 35-39 of the pattern instructions.
Final Details
Follow steps 35 & 36.With the main side up and beginning at the bottom of the right front placket (the right when you are facing the coat), top stitch at 1/4" up the placket, around the neckline, down the opposite placket, and around the hem of the skirt.
TIP: Since the layers are a little thick, use a medium-long stitch length for top stitching. If you have to lengthen your stitch even further when going around the neckline due to there being more layers there, do so.
Make sure to move the hood out of the way of your stitching so you don't sew it down.

Follow step 37 of the pattern to top stitch the arms of the coat.
Adding the Buttons and Button Holes
Now, follow step 38 and make 6 button holes on the left placket (left when facing the coat). If you have to refresh your button hole marks now, make sure that you take into account the seam allowance that is on your pattern piece but is no longer on your coat.I recommend looking at the manual for your sewing machine and following the button hole instructions there. This is how I learned to make button holes. If your machine has multiple button hole shapes to choose from, your manual should explain what each one is for. I chose to use #30 on my machine. This image is from the Brother XR6060 manual.

IMPORTANT: Test your button holes on scrap material from your coat before you put your coat under the machine! You want your settings to be correct for the material. Make sure you use as many layers in the test as you will be sewing through on the placket.
Step 1:
Attach your button hole presser foot. The long end should be towards the back of your machine.

Step 2:
Pull out the little piece at the back of the foot that can move. This is your button guide plate. Place your button in this space and pinch the plate closed as tightly as the button allows it to go. This will make your button holes the perfect size for your buttons.

Step 3:
Set the correct stitch on your machine and pass the upper thread through the hole on the presser foot.
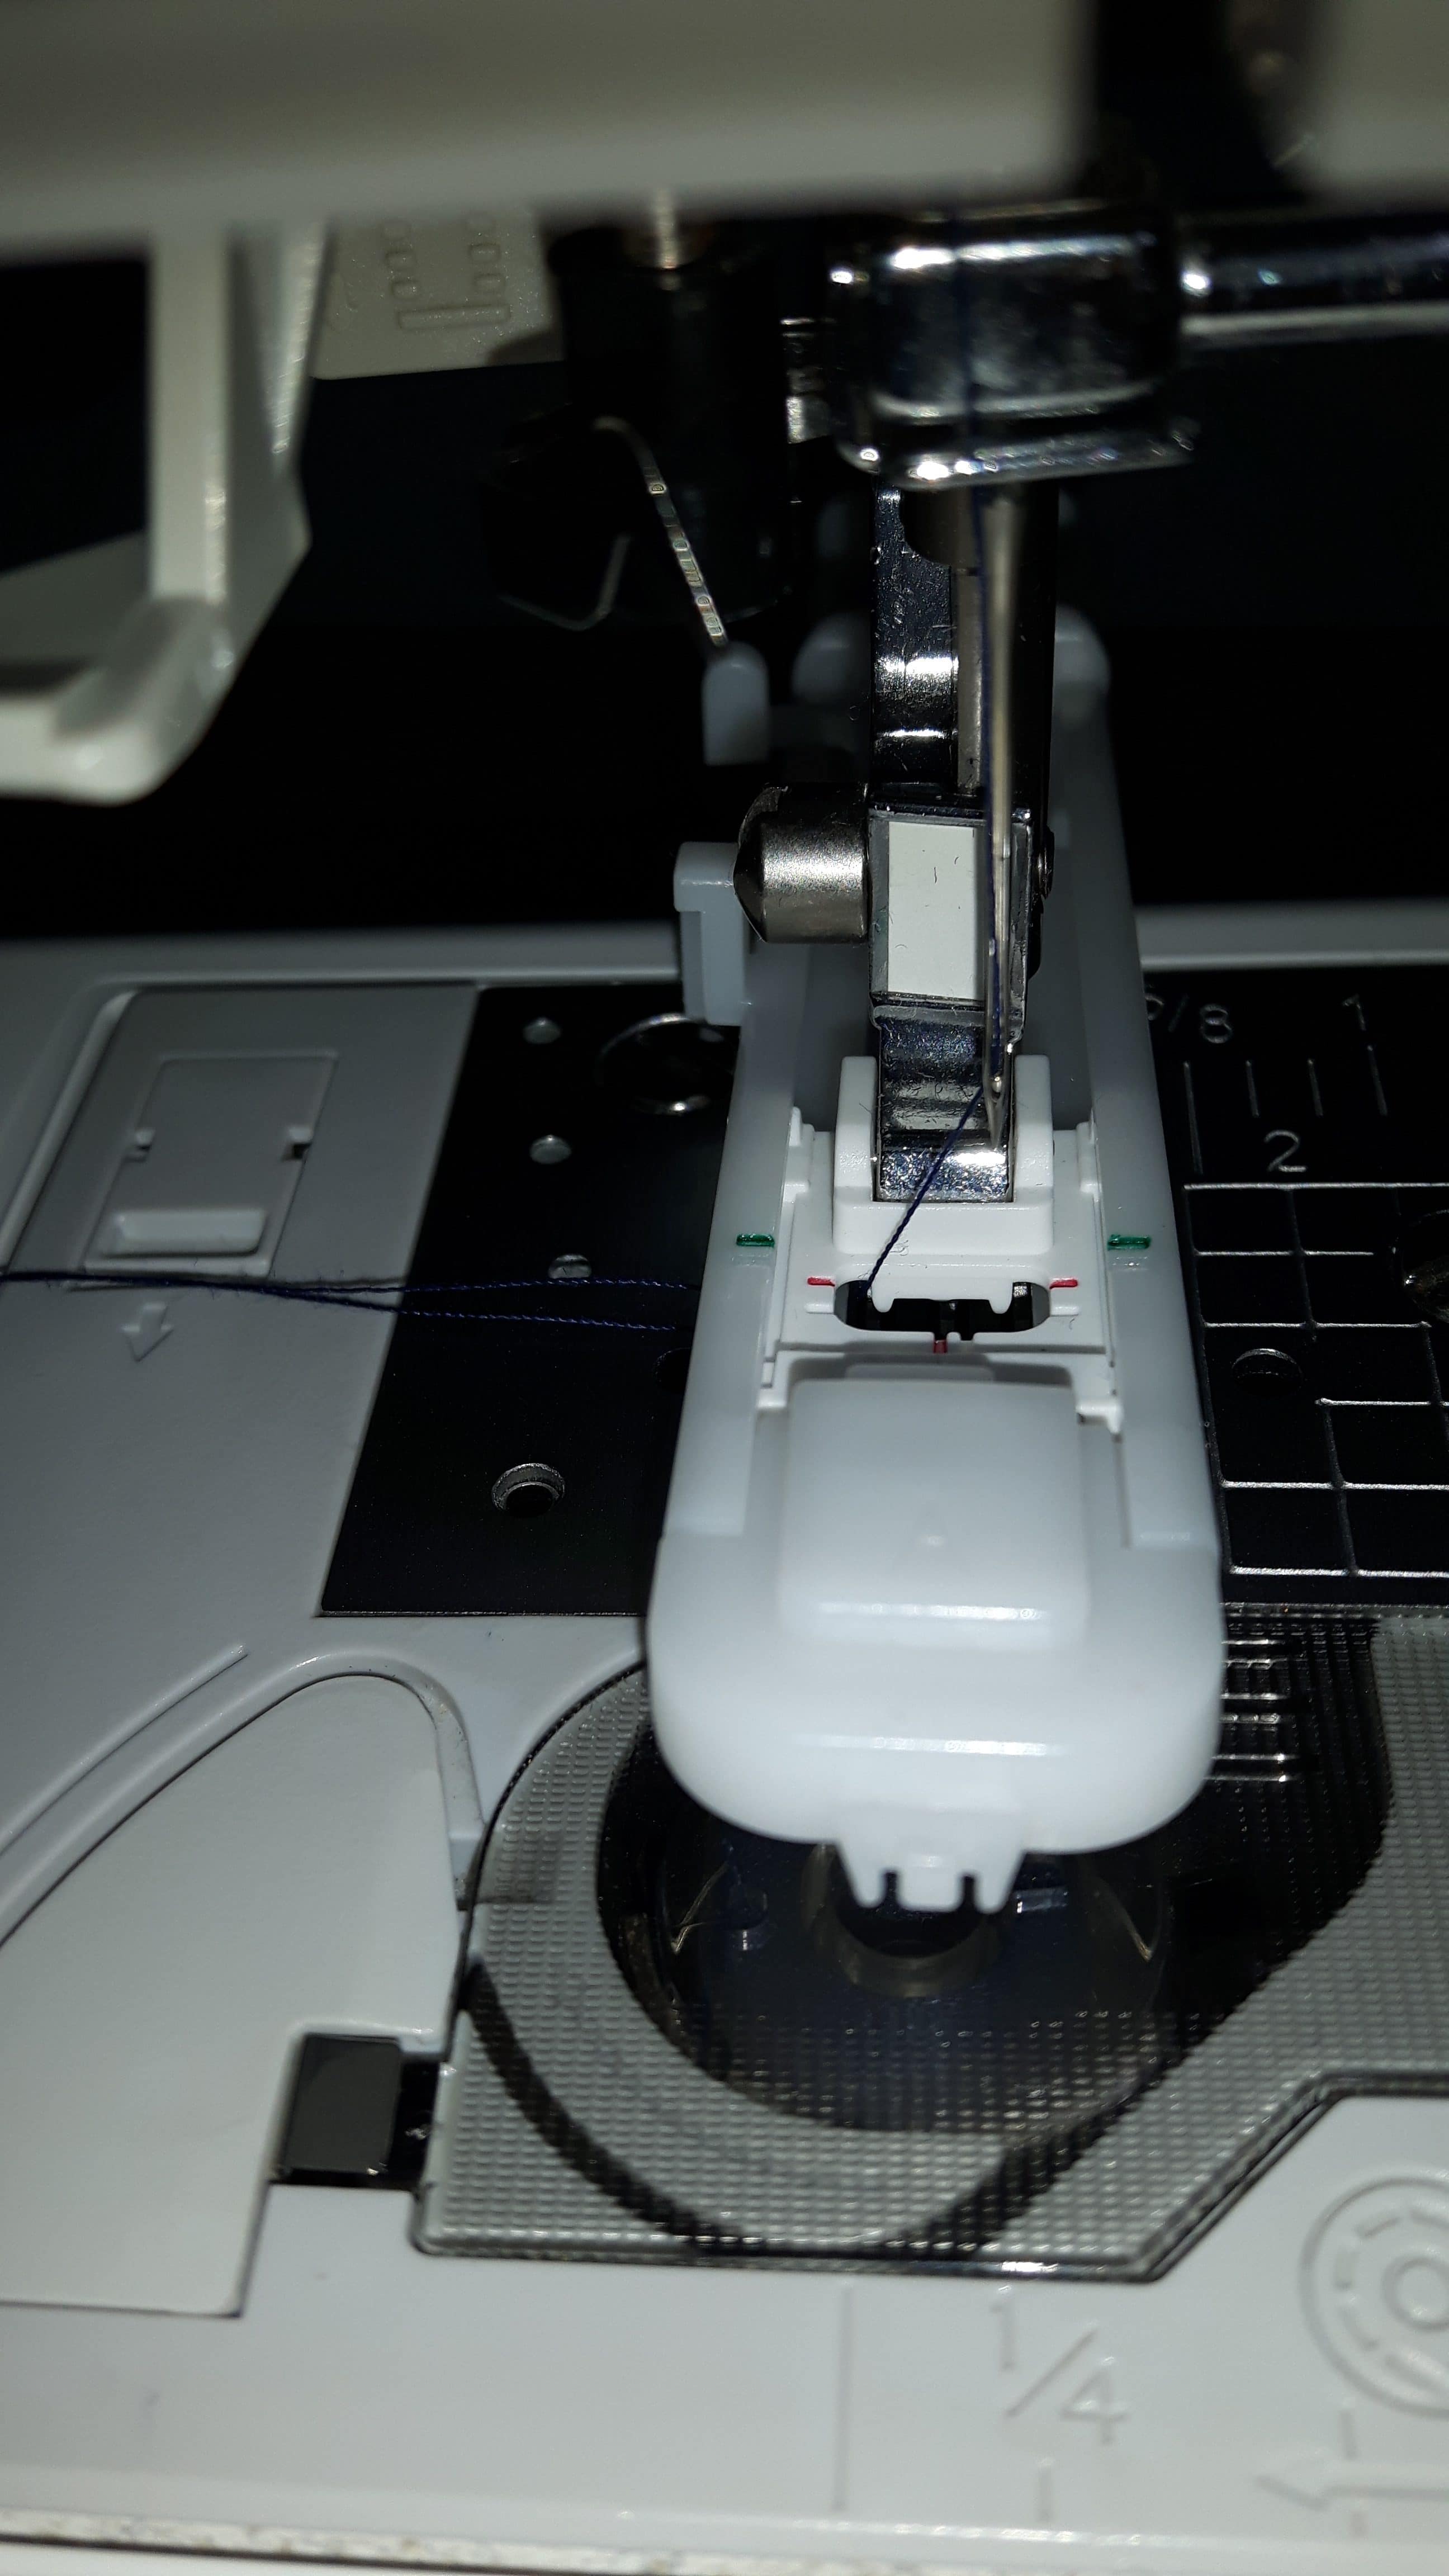
Step 4: Position your fabric under the presser foot. Align the end of the button hole that is closest to the placket edge with the horizontal marks in the needle hole of your presser foot (red in my picture). The line of the button hole mark should be extending towards the back of your machine and should be aligned with the vertical mark in the needle hole.

Step 5:
Pull down the button hole lever - found on the left - as far as it will go and position it behind the bracket on the side of the buttonhole foot.

Step 6:
Make sure that the marks on the outside of your foot (green in the above picture) are aligned with the marks around the needle hole. Gently holding the ends of your threads, start sewing. You will not have to guide the fabric, the machine will move in the shape of the button hole by itself. If it struggles, you can give the fabric a little help to move, but allow the machine to guide it.
TIP: If any part of the botton hole foot or lever are getting caught and therefore unable to make the shape, try setting up to sew the hole from the opposite end of the button hole mark and in the opposite direction. I had to do this for the bottom left button hole. The one nearest the princess seam.
Step 7:
Raise the needle and the presser foot, remove the fabric, and cut the thread. Inspect your practice button hole to determine if you want to make any changes to your settings. If you make any changes, test them on another scrap!TIP: If you want the zig zags down the length of the button hole to be closer together (denser), adjust the length setting. Thicker materials may require a coarser setting though.

Step 8:
Insert a pin across the end of the button hole to protect the stitches at that end. In the channel, starting at the opposite end and moving towards the end protected by the pin, cut your button hole open. Stop at the pin. I use a utility blade for this.
Step 9:
Sew your buttons in place in the corresponding positions on the opposite placket.
Congratulations! You have made it to the end of the sew-a-long and have finished Gabriella's Winter Coat! Don't forget to put a picture of your finished coat in the Day 8 thread in the Facebook album for participation in voting. Take the time to vote for your favorite finished coat too. There are prizes! People who did not participate in the sew-a-long are encouraged to vote too.