Reagan Raglan Sew Along Day 4 ~ Adding a V-Neckband
I know there are a lot of people nervous about doing a v-neck. BUT... If you follow the steps correctly, you should get a PERFECT neckline that you can be VERY proud of. Are you ready for it? Let's go!Step one:
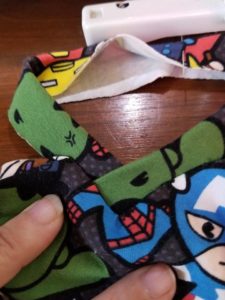
Fold your neckband together lengthwise with right sides together. Then bring the folded ends together to form your neckband loop. Make sure the raw edges are at the bottom and then baste the bottom corner of your v. Like so:

It's also helpful to stick a pin through the back center for a later step.
Step two:
Stay stitch the neckline on the bodice for about 1 1/2" at the seam allowance (3/8" in from the edge). It is so important that you do not skip this step and for you to be as exact as you can at that point. Once your stitches are in, clip in from the corner to the stitching without cutting THROUGH the stitches. Place a pin at your corner to mark it.

Now, pin the point of the neckband to the corner of your neckline, taking care to be as precise as you can.

Step three:
Without removing the pin, shift the neckband to one side and pin it well to the neckline. Sew from the point out by about 1 1/2".

With that done, shift it the other way and sew the other side the same 1 1/2", being very careful not to sew any folds or tucks. When you're done, the view from the bodice side will look something like this.

Flip the point to the inside and make sure you don't have any puckering at the corner.

If everything looks good, yay! Congrats! If not, breathe, find the seam ripper and try again. But I promise, once you've done it right once or twice, it gets SO much easier!
Step four:
Now the hard part is done! Flip the neckband back around and use the pin at the center back to match the center back of the neckline and pin and stitch as usual, stretching the neckband to fit and starting and stopping where you have already attached the corner. Finish your edges, flip the seams to the inside, and use your favorite stretch stitch or coverstitch to tack the neckband seam allowance down to the bodice.

Congratulations! You just made it through the hardest part of the sew along! If you are sewing the NEW scoop neckline, follow below.
Step one:
Stitch the short ends of your neckband together, right sides together.

Fold this in half lengthwise with wrong sides together and quarter it with pins.

Step two:
Quarter the bodice neckline and then match pins together beginning with matching the neckband seam to the center back bodice. Stitch with the 3/8" seam allowance and finish your edges.

Step three:
Flip the seam allowance down inside the bodice and use a stretch stitch or coverstitch to tack the neckband seam allowance down to the bodice. Boom! You're done!

You guys ROCK! I just thought you should know. If you're seeing this blog for the first time, you can get the Ladies or Kids pattern for FREE by joining the Bella Sunshine Facebook group and grabbing the code from the pinned post. Also, if you're following along, don't forget to swing by the group and add your progress to the comments of today's picture in the sew along album! I can't wait to see all of the beautiful necklines!
