Make A Vertical Pencil Pouch! A Tutorial
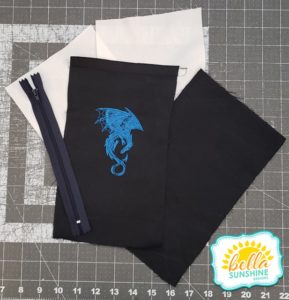
First thing's first, we need supplies, right? Yes! So, what we need is...

2 outer pieces 6" wide by 10" tall (I used plain fabric, but embroidered the front for a little more fun.)
2 lining pieces 6" wide by 10" tall
1 9" zipper
Straight pins and/or clips
Thread (matching or contrasting, your call)
Sewing Machine
Hand sewing needle (optional)
Step One: Zipper Installation

Lay one of your outer pieces right side up in front of you. Then lay the zipper pull side down on top of that with the zipper closed and the pull to the left. Center the fabric under the zipper.

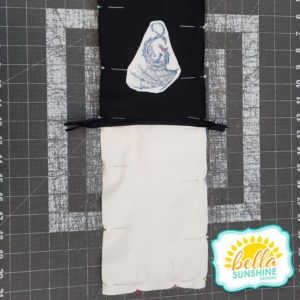
Once that's done lay your lining on top, right side down, making sure it lines up with your outer piece. They should be right sides together with the zipper sandwiched between them. Pin.

You should have something that looks like the picture above. Then using your zipper foot, stitch along the top edge, making sure not to get too close to the zipper teeth.

Once it's all stitched, flip the fabric down away from the zipper and give it a press. then, placing it back under your machine, topstitch it approximately 1/8" from the seam.

With the topstitching on that side complete, you're just going to repeat these steps with the other main and lining pieces. When that's done, you should have something that looks like the above picture.
Step Two: Assembling the pouch

Line up your pieces main to main and lining to lining and pin.

Push your zipper toward the main side, as shown. And UNLIKE my picture, make sure you unzip your zipper about 3/4 of the way across the body of your pouch so that you will be able to turn it right side out later.

Now you are going to stitch your way around at a 3/8" seam allowance, leaving an opening at the bottom of the lining about 2" wide for turning. Clip the corners and trim the access zipper.
Step Three: Boxing the bottom corners
For another fun little twist, we're going to box the bottom corners of this pencil pouch.

In order to accomplish this, first, we're going to flatten the corners seam to seam to create a right angle, as shown. Measure one inch down from the point.

Once you're sure everything is lined up and straight, draw a line across the piece and pin it to keep everything in place. Repeat for the remaining three corners.
*pro tip: If working with dark fabrics, use a white fabric marker, chalk, or metallic sharpie to make your lines more visible.

Sew along the lines you drew and you'll have your boxed corners! Easy peasy, right? And here you can see the turning hole too.
Step Four: Finishing up

Turn your pouch right side out through the hole in the lining. Make sure to push out your corners on the outer pieces for the crispest look. Now, you can either edge stitch that hole closed on your machine, or you can hand stitch it closed. Once closed, push the lining back inside and zip it shut.

And you have a finished pencil pouch! You may want to give it a final press, but it's done!
Final Notes
Just a couple of notes...
Zipper size doesn't matter THAT much. Just make sure it is longer than the 6 inches that the fabric pieces are.
While this tutorial was pictured in and designed for woven fabrics, you CAN make it with knits! Just make sure you use Sf101 fusible interfacing (or similar) on the backside of any knit pieces for stability while you sew.
And if you make one of these little beauties, PLEASE come share it with us in our Facebook group! We would LOVE to see them! Have other tutorials you'd like to see us do? Please leave your suggestions in the comments below!
