Garments With a Pop! Adding Appliques and Reverse Appliques
Before we get started, here's what you'll need. The cut fabric for your garment (or a pre-made garment you want to add to), a template for your applique, a coordinating fabric piece for the applique, your sewing machine, thread, and plenty of needles. For your applique, you have a few options. You can freehand your own, you can trace it from a coloring or other book, or... You can download the FREE shape template from our shop that includes all major holiday shapes! Got all that? Great!You can use either of these methods with pretty much any fabrics, but there are minor differences. We'll start with a traditional applique.
Note: I am using scraps for the purpose of this tutorial. When doing yours, you may do this on unsewn pattern pieces, a completed handmade item, or any store bought item you choose!
Adding a Traditional Applique

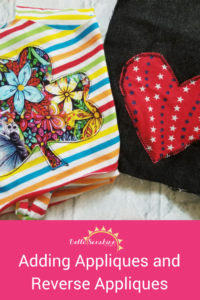
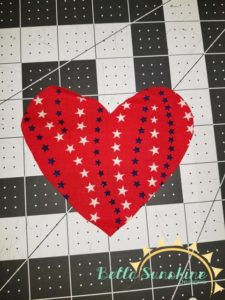
Use your applique template to trace the shape onto the wrong side of applique fabric and cut the shape out.

Take your cutout and place it where you want it on the garment. Reposition if needed. Pin well once you finalize a location.

If you're using a knit applique, you can just sew a straight stitch around the perimeter of your shape (I recommend 1/8 to 1/4" in). If you have a woven applique piece, and you want it to last, the best option is to zigzag around the outside edge of the applique to hold everything down and keep it pretty. You can always use the knit option on woven as well, but be aware your edges will fray and it probably won't last as long.
Adding a Reverse Applique
This method of adding an applique is a little more difficult, but a lot more unique. I personally LOVE the way it looks! This works best if your main garment is knit, although it would also look pretty awesome on denim.
To start, once again trace your shape onto the wrong side of your applique fabric piece. This time, instead of cutting the shape out, cut a square or circle shape around the applique shape. If your applique fabric is woven, zigzag or serge around the edge of the piece.

Here's where it gets a little trickier. You want to place and pin your applique like before, but this time you're going to pin it a little differently. Place your garment/main fabric right side down and then place the applique on top of that, also right side down. This places the applique on the INSIDE of the garment.

Adding Appliques and Reverse Appliques - Bella Sunshine Designs Ooh! I've always wanted to know how to do this! And it looks so EASY with this tutorial! I can't wait to try it!!! Pin for later!
Now, stitch the applique piece in place following the lines you drew on the wrong side.

Once that's done, flip your garment to the right side and CAREFULLY cut away the main fabric from inside the stitching. Be very careful to not cut the applique fabric!

What you end up with is like a window to the back piece, and it looks SO cool! If you're using knit, you're done! If you're using a woven for the main piece, you might consider going back around the perimeter with a zigzag. Or, you can leave it to fray for a cool distressed look.
That's it! Now you can add a ton of character to all of your clothes! Do you have any other fun tutorials you'd like to see? Please let us know in the comments! And come join us in our Facebook group to share you Bella Sunshine makes!
